
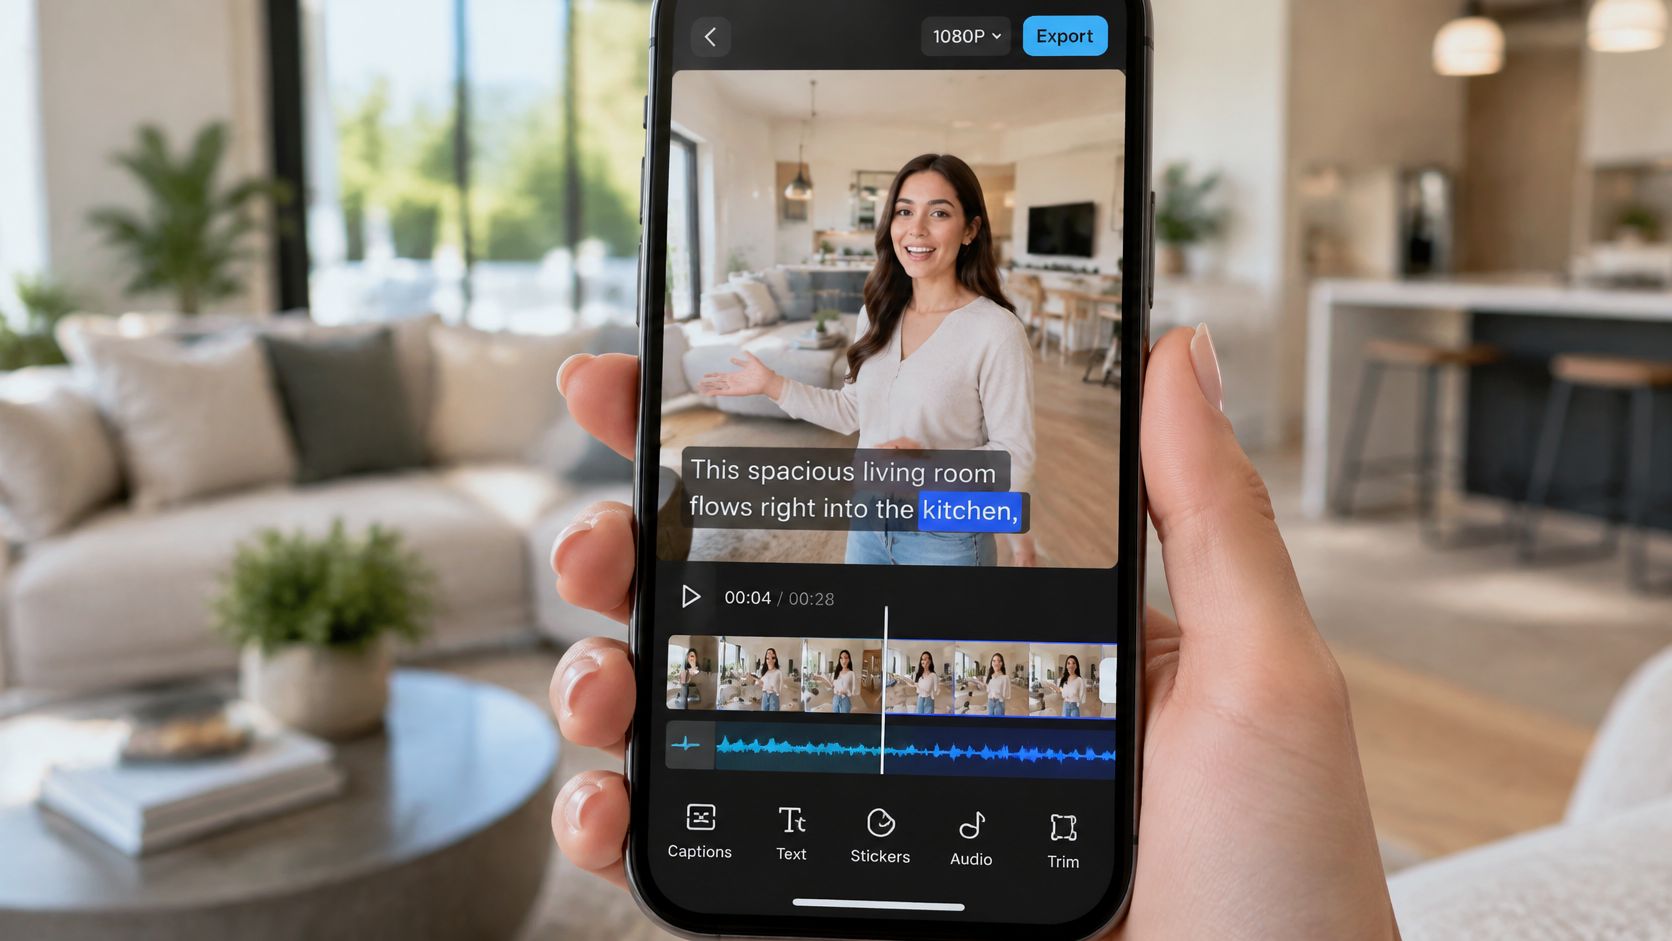
Approximately 75–80% of social video is watched on mute, according to research summarized by Texas Tech University's social-media accessibility guidance. For a property tour, that means viewers may never hear the street name, room descriptions, or invitation to book a showing.
Learning how to do auto captions on Instagram starts with choosing the right text layer. Instagram can transcribe your narration, but automatic output is a draft, not a checked listing description. Choose your caption route before recording, then leave time to verify the property facts before publishing.
Learning how to do auto captions on Instagram starts with choosing the right text layer. Instagram can transcribe your narration, but automatic output is a draft, not a checked listing description. Choose your caption route before recording, then leave time to verify the property facts before publishing.
Summary
Create an AI Video Tours from PhotosTry it For Free
Pick the Right Caption Method for Your Reel
| Method | Where it lives | Viewers can turn it off | Best for | Watch out for |
|---|---|---|---|---|
| Captions sticker | Visible text layer added in the Reel editor | No | Quick native Reels with clear speech | Mobile app only; every line needs proofreading |
| Closed captions through Reel settings | Viewer-controlled caption track | Yes | Accessibility-first uploaded Reels | Availability is limited by region and Reel type; check More options |
| Burned-in captions from VideoTour.ai export | Permanently part of the rendered MP4 | No | Videos reshared to other platforms | Check before export; text can't be edited inside Instagram |
| Manual text layer | Typed onto the video in the editor | No | Prices, URLs, dates, and music-only sections | Slow for dialogue-heavy tours |
Choose around the viewing situation
A buyer scrolling on a muted phone may see the hallway but miss the street name in an agent's narration. Visible captions let viewers follow spoken details without turning on sound.Captions also support Deaf and hard-of-hearing viewers. Treat the text as part of the message, not decoration.
Open captions stay visible to everyone because they're part of the video image. Closed captions are a separate track viewers can control. Choose open captions when every viewer should see the text, or a closed-caption track when viewer control matters.
For a video you'll download and reshare, VideoTour.ai can add captions to the rendered MP4. Check them before export, since burned-in text can't be edited inside Instagram. If you're planning a scripted introduction rather than filming a walkthrough, a text to video creation tool is another option to consider during production planning.
Practical rule: For a native property tour, start with the Captions sticker and add manual text for key facts. For a video you'll download and reshare, choose corrected burned-in captions.Before recording, keep narration clear and deliberate. Pause between location details, avoid talking over another speaker, and keep music low enough that the agent's voice remains easy to hear.
How to Add Auto Captions to a Reel Step by Step
Use the Instagram mobile app for this workflow. Instagram's caption help describes caption controls for Reels, including the distinction between visible captions and caption settings.
If you haven't assembled the tour yet, follow our guide to creating an Instagram Reel before starting the caption pass. Locking the footage first prevents unnecessary timing work.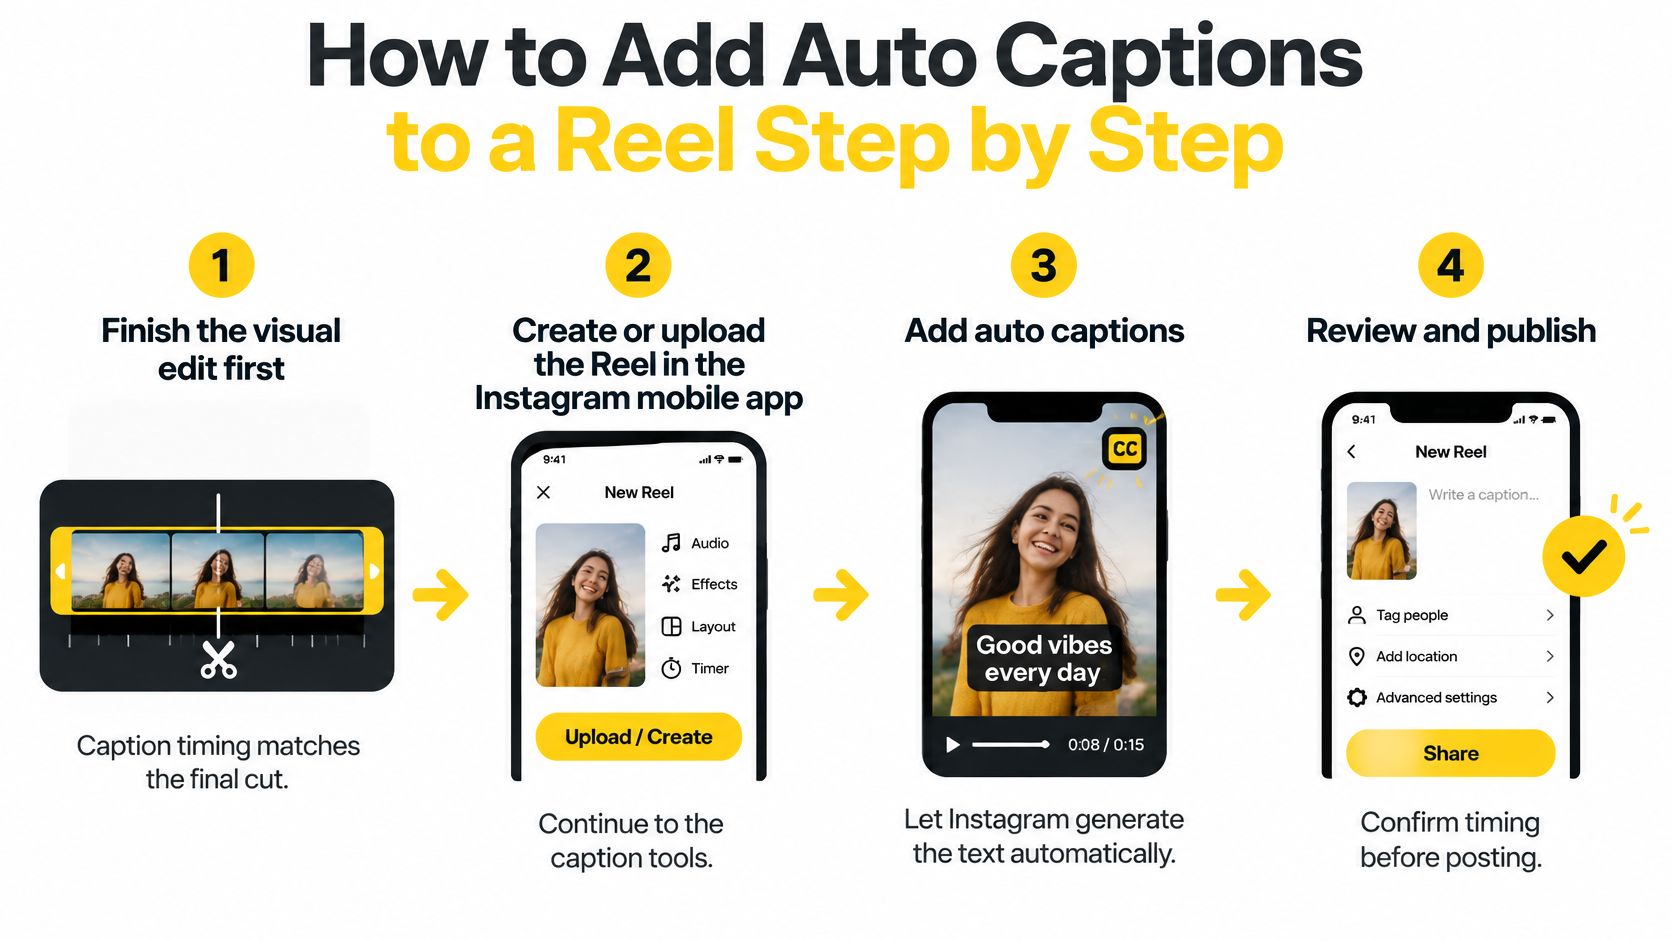
A finished layer follows the speech, stays inside the frame, and leaves the property details unobstructed. After publishing, open the Reel's options to review the caption controls available for that post.
These steps are for Reels. Before using the same process for a feed video, confirm that your app offers the Captions sticker and closed-caption controls for that post type.
If you haven't assembled the tour yet, follow our guide to creating an Instagram Reel before starting the caption pass. Locking the footage first prevents unnecessary timing work.
Generate and correct the text
- Finish the visual edit first. Trim clips, arrange the tour, and settle the narration before generating captions. Adding or removing footage afterward can leave text attached to the wrong moment.
- Create or upload your Reel. Open Instagram's Reel composer, record a video or select your finished file, then continue to the editing screen. Make sure you've selected the final version, not an earlier export with outdated listing information.
- Open the sticker tray and select Captions. Wait while Instagram transcribes the spoken audio into an on-screen text layer. Don't assume music-only footage will produce useful property descriptions, because speech recognition needs spoken words.
- Tap individual words to correct mistakes. Start with street names, agent names, neighborhood names, and spoken numbers before adjusting appearance. A polished style won't compensate for an address that points buyers toward the wrong property.
- Choose the style and position. Select a readable caption treatment and move it away from room labels, logos, and agent contact information. Check different clips, because text that works over a dark hallway may disappear against white kitchen cabinets.
- Check the closed-caption controls if you need a viewer-controlled track. For an uploaded Reel, look under More options or Advanced settings for Enable closed captions or Show captions, where offered. Preview the result rather than assuming this control behaves like the visible sticker.
- Watch with sound off, then publish. Confirm that the words appear with the correct speech and that no text is clipped by the frame. Read the address and price overlay as a buyer would, without relying on your knowledge of the listing.
Check the upload route
Instagram doesn't provide a dependable external SRT or VTT upload workflow. ClipCreator.ai's guide on how to use SRT files for short videos can help you understand file-based caption workflows, but don't mistake an SRT export for an Instagram import option. For Instagram, render the text into the video or finish captions in the app.A finished layer follows the speech, stays inside the frame, and leaves the property details unobstructed. After publishing, open the Reel's options to review the caption controls available for that post.
These steps are for Reels. Before using the same process for a feed video, confirm that your app offers the Captions sticker and closed-caption controls for that post type.
Style Captions So Viewers Can Read Them
A caption can be accurate and still be unreadable. Property footage makes styling especially important because the background changes from dark flooring to bright windows, patterned tile, and pale walls.
Don't judge the result only on a desktop preview. Hold your phone at a normal viewing distance and check whether you can read the captions without leaning closer.
Line length and timing work together. Break text at natural phrase boundaries instead of squeezing a complete sentence into a narrow strip. For example, keep a room description together rather than separating the room name from its main feature.
A kitchen caption placed near the bottom may overlap a price overlay or sit beneath interface controls. Move the dialogue to an uncluttered area and reserve a separate position for the price.
Use these checks while styling:
Play the result at normal speed on your phone. If a line needs a second look, make it easier to read rather than expecting viewers to pause.
Make the words readable against the property
Size and contrast come first. Choose a clear font and use a stroke or background treatment when available. On a kitchen clip, plain white letters can disappear into cabinetry; a contrasting outline preserves the words without requiring a large solid block over the room.Don't judge the result only on a desktop preview. Hold your phone at a normal viewing distance and check whether you can read the captions without leaning closer.
Line length and timing work together. Break text at natural phrase boundaries instead of squeezing a complete sentence into a narrow strip. For example, keep a room description together rather than separating the room name from its main feature.
If you can't comfortably read a caption before it changes, shorten the line, simplify the wording, or adjust the timing.
Give captions and listing facts separate space
Placement should account for Instagram's interface. Keep text away from the edges and check it against the profile information, caption area, and action buttons in the posting preview. There isn't a useful universal placement shortcut if you never inspect the final screen.A kitchen caption placed near the bottom may overlap a price overlay or sit beneath interface controls. Move the dialogue to an uncluttered area and reserve a separate position for the price.
Use these checks while styling:
- Protect the subject. Don't place text over the feature you're describing, such as a fireplace or built-in storage.
- Preserve hierarchy. Make room labels and listing facts distinguishable from spoken dialogue.
- Keep a repeatable treatment. Use consistent fonts and colors across a brokerage's listing videos.
Play the result at normal speed on your phone. If a line needs a second look, make it easier to read rather than expecting viewers to pause.
Check Accuracy and Fix Caption Failures
Verify against the listing, not your memory of the tour. Start with street names and house numbers, then check measurements, bedroom and bathroom counts, price and fee wording, neighborhood names, and the agent's name.
Gallaudet University's social-media accessibility guidance treats automatic captions as a starting point that requires review. That distinction matters in real estate: a transcript can look fluent while misidentifying the property.
Use this checklist beside the listing while reviewing the draft.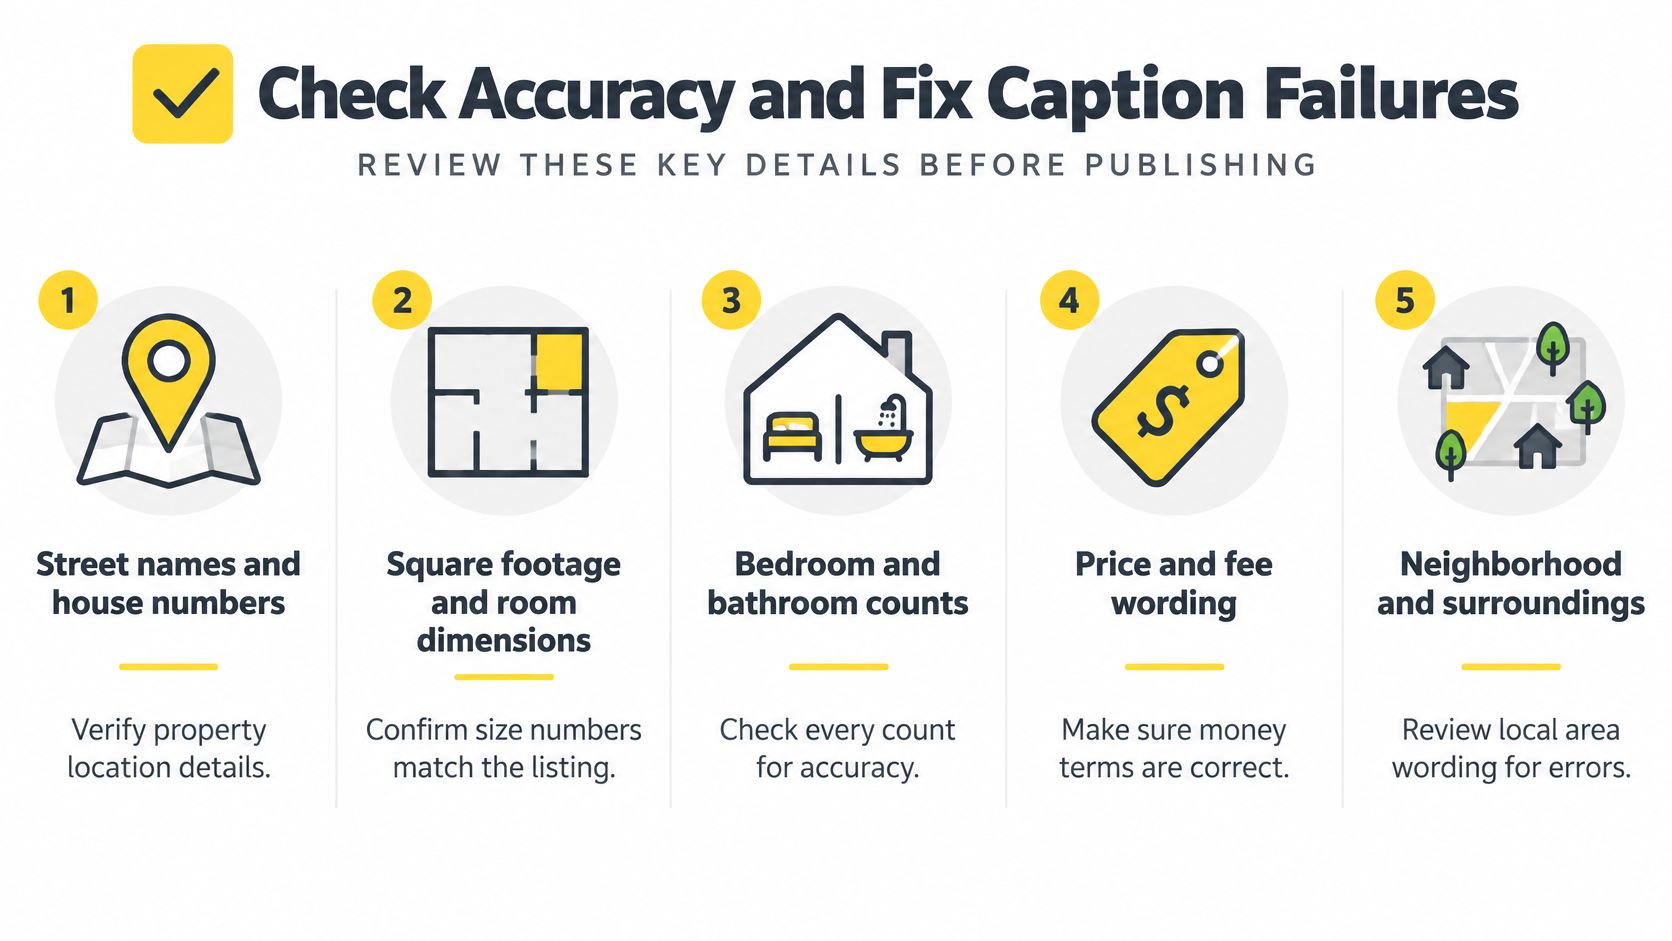
For a missing sticker, update Instagram and test a short draft without publishing it. Use clear speech in the intended language so you can distinguish a feature-availability problem from an audio problem.
Changing the app's interface language isn't a dependable fix for unsupported transcription. If the control still isn't available, stop spending production time searching menus and prepare visible captions before upload.
For bilingual narration, inspect the point where the speaker changes languages. Say a Spanish-speaking agent uses an English street name in the middle of a sentence. The surrounding speech may transcribe acceptably while the address fails.
Correct that phrase manually if the editor permits it. If the system repeatedly produces unreliable text, build a corrected caption layer before upload rather than compromising the address to match the transcription.
Then listen with sound on and compare the caption timing to the narration. A line that appears over the next room can make the description ambiguous even when every word is correct.
If a correction affects footage or narration, inspect the neighboring captions again. Small edits can change where a phrase begins or ends, so don't approve the file solely because the transcript text is clean.
Gallaudet University's social-media accessibility guidance treats automatic captions as a starting point that requires review. That distinction matters in real estate: a transcript can look fluent while misidentifying the property.
Run a property-specific accuracy pass
Keep the approved listing details beside the caption editor. Compare each factual statement directly with that reference, including abbreviations and qualifiers.- Location details. Read the street suffix and neighborhood name carefully. A hypothetical transcription of Oak Ridge Lane as Oak Ridge Land looks plausible enough to miss during a fast skim.
- Measurements and counts. Check both the number and what it describes. A correct-looking measurement is still misleading if the caption attaches it to the wrong room.
- Money terms. Preserve the distinction between asking price, rent, fees, and other charges. Don't let punctuation or a missing qualifier change the meaning.
- Names and required wording. Verify agent names, brokerage names, acronyms, and any approved disclaimer text word by word.
- Unspoken information. Add a manual layer for essential prices, contact details, URLs, or open-house information that the narration never mentions.
Use this checklist beside the listing while reviewing the draft.
Match the fix to the failure
A missing control isn't necessarily an editing mistake. RNID's Instagram caption guidance notes availability limitations, including mobile-only caption creation and differences in language support.| Symptom | Likely cause | Fix |
|---|---|---|
| Captions sticker missing | Region, language, or outdated app | Update the app, check the spoken language, then use burned-in captions if it still doesn't appear |
| Closed captions option not shown | Reel type or upload path doesn't offer it | Check More options or Advanced settings on the uploaded Reel; otherwise rely on the visible sticker |
| No captions option on a computer | Feature is mobile-only | Create or edit the captions in the mobile app |
| Wrong names, streets, or accents | Speech recognition misreads proper nouns | Correct each word by tapping it, then recheck street and agent names |
| Captions cover room labels or price overlays | Text placed near interface controls or other overlays | Move the caption position and shorten long lines |
| Bilingual speech transcribed poorly | Language mix outside supported transcription | Correct the transcript manually or create a burned-in master layer before upload |
Changing the app's interface language isn't a dependable fix for unsupported transcription. If the control still isn't available, stop spending production time searching menus and prepare visible captions before upload.
Handle names and multilingual speech deliberately
Proper nouns deserve their own review pass because they often resemble ordinary words. Read only the street, neighborhood, and agent names in the transcript, then compare them with the approved spelling. This focused pass catches errors that disappear when you read the whole sentence for meaning.For bilingual narration, inspect the point where the speaker changes languages. Say a Spanish-speaking agent uses an English street name in the middle of a sentence. The surrounding speech may transcribe acceptably while the address fails.
Correct that phrase manually if the editor permits it. If the system repeatedly produces unreliable text, build a corrected caption layer before upload rather than compromising the address to match the transcription.
A clean-looking transcript isn't proof that the listing facts are correct.Don't automatically replace spoken dialogue with promotional copy. Captions should preserve what the speaker says; separate property overlays can carry additional listing information. If the narration itself contains an error, fix the audio or remove the affected passage instead of displaying a contradictory caption.
Make the final check a buyer's check
Preview the actual upload on your phone with audio muted. Look for a wrong price, a missing qualifier, or a contact detail hidden behind the interface, not just spelling mistakes.Then listen with sound on and compare the caption timing to the narration. A line that appears over the next room can make the description ambiguous even when every word is correct.
If a correction affects footage or narration, inspect the neighboring captions again. Small edits can change where a phrase begins or ends, so don't approve the file solely because the transcript text is clean.
Export Your Captioned Video and Post It
Treat export as a controlled handoff, not the end of editing. The file you upload should be the exact version you've reviewed, with the intended text treatment and format.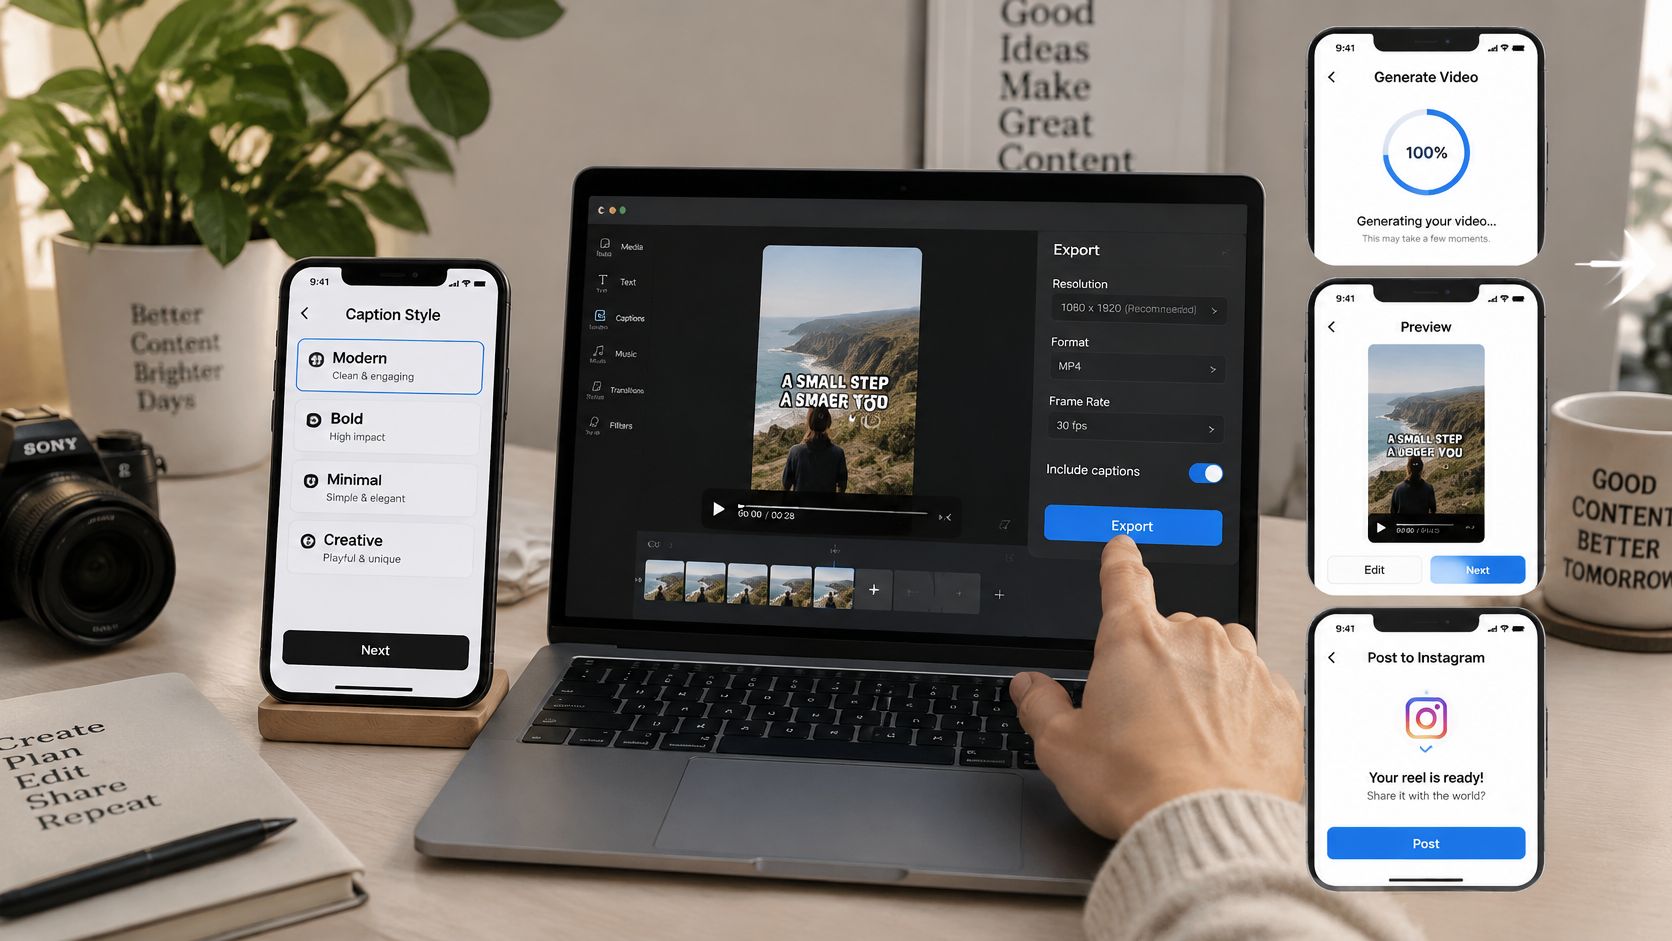
Keep the approved caption text with the project so later revisions don't reintroduce old mistakes. Open the downloaded MP4 before upload, confirm it's the corrected version, and check the selected file again in Instagram's preview.
VideoTour.ai lets you edit captions for each photo individually, including text, position, font, size, and stroke, and turn them on or off for specific clips. Visit VideoTour.ai to build your property tour, apply the accuracy checks, and correct the captions before downloading the finished video.
Prepare the final file
- Set the caption style before generation. Choose the intended treatment before creating the video so you're not rebuilding the appearance afterward.
- Generate, preview, and correct. Resolve the factual and readability issues flagged during review before committing text to the rendered file.
- Download the MP4. Find the actual video on your phone, then upload it as a Reel or feed post. Our Facebook and Instagram posting guide explains that download-and-upload path.
- Avoid duplicate visible captions. Don't add Instagram's Captions sticker over an already captioned export. Check any additional caption track in preview so viewers don't get competing text.
- Confirm the format and crop. For a vertical tour intended as a Reel, inspect the framing before posting. Make sure the export hasn't cut off property details or shifted text toward the edge.
Check each destination separately
Say a brokerage prepares a vertical social tour and a horizontal MLS version from the same property assets. The corrected wording can carry across, but caption position needs a fresh check in each layout.Keep the approved caption text with the project so later revisions don't reintroduce old mistakes. Open the downloaded MP4 before upload, confirm it's the corrected version, and check the selected file again in Instagram's preview.
VideoTour.ai lets you edit captions for each photo individually, including text, position, font, size, and stroke, and turn them on or off for specific clips. Visit VideoTour.ai to build your property tour, apply the accuracy checks, and correct the captions before downloading the finished video.